
Aggregation levels
Having
planning-enabled InfoProviders are not enough to start planning. In our
scenario, actual volumes are provided from CO-PA and we want to use those
actual volumes to plan into the future. Our model is very simple, containing
only a few InfoObjects, but in real life, CO-PA may contain 50 or more
characteristics and all of those characteristics may need to be filled during
planning. However, the user may not always know or care what the right
combinations are for planning, all he wants to do is enter his planned volumes
as quickly and easily as possible. A volume planner may only look at the Sales
Area, customer and material for his planned volumes and does not need to see
other characteristics such as Brand, Material Group, Material Type etc. So
while the planner does not want to see these fields or have them available for
planning, they must be available for reporting. The aggregation level allows us
to meet this goal.
The aggregation
level is a subset of the characteristics in our InfoProvider (aDSO or Composite
Provider) that we want to plan on. We will adhere to the following principles:
- Create the Aggregation Level on the Composite Provider
The aggregation level based on the composite provider
also allows us to write to multiple InfoProviders with queries or planning
functions. We can thus write to multiple aDSOs where the data is portioned
across aDSOs.
Aggregation Levels in action
Say I have the following records for actual volumes
Creating an aggregation level
Filters
Where aggregation levels control what fields are written to, the filter tells us to which data intersection, or target area, to write to. A clear distinction must be made between what is reference data, and what is my target data area. It becomes really important when considering that the data in the target area is locked whenever the filter is active (either thought a query or planning function). We want to lock as small and area as possible to enable multiple users to work on the same aDSO or aggregation level without stopping their work. So let’s look at an example as an extension of the example used for aggregation levels.
Creating a filter
Conclusion
Aggregation levels and filters are two of the basic building blocks for planning functions and sequences. Aggregation levels defines a subset of the characteristics in the InfoProvider while the filter determines the target data area. In the next chapter, we will build a planning sequence to copy data and illustrate these principles in more detail.
If you like this chapter, please support me on Patreon:
Become a Patron!
- The characteristics of the aggregation level should only be those characteristics of the underlying aDSO.
- Since the objective is to write the data to an aDSO, we should not include any characteristics from an aDSO that we are not writing to. If we include a wrong characteristic by mistake, the system will still save the aggregation level, but we will get errors when saving the data in the query or planning function.
Any characteristic that is not in the aggregation level, but
in the underlying aDSO will contain the value ‘#’, unless we have a Characteristic Relationship that fills
the field (more on Characteristic Relationships in a later chapter).
Aggregation Levels in action
Let’s look at an aggregation level by way of an example:
0MATERIAL
|
0MATL_GROUP
|
0CUSTOMER
|
0SALESORG
|
0VERSION
|
0VTYPE
|
0FISCPER
|
0FISCPER3
|
0FISCYEAR
|
0FISCVARNT
|
0QUANTITY
|
0UNIT
|
TG10
|
L0001
|
17100001
|
1710
|
100
|
20
|
2019002
|
2
|
2019
|
K4
|
120
|
ST
|
TG10
|
L0001
|
17100002
|
1710
|
100
|
20
|
2019002
|
2
|
2019
|
K4
|
80
|
ST
|
FG126
|
L0002
|
17100001
|
1710
|
100
|
20
|
2019002
|
2
|
2019
|
K4
|
100
|
ST
|
We now build our aggregation level containing a subset of
these fields. The data will be aggregated on the fields selected in the
aggregation level
0MATERIAL
|
0SALESORG
|
0VERSION
|
0VTYPE
|
0FISCPER
|
0FISCVARNT
|
0QUANTITY
|
0UNIT
|
TG10
|
1710
|
100
|
20
|
2019002
|
K4
|
200
|
ST
|
FG126
|
1710
|
100
|
20
|
2019002
|
K4
|
100
|
ST
|
We now use the actuals above and copy them to version 101:
0MATERIAL
|
0SALESORG
|
0VERSION
|
0VTYPE
|
0FISCPER
|
0FISCVARNT
|
0QUANTITY
|
0UNIT
|
TG10
|
1710
|
100
|
20
|
2019002
|
K4
|
200
|
ST
|
FG126
|
1710
|
100
|
20
|
2019002
|
K4
|
100
|
ST
|
TG10
|
1710
|
101
|
20
|
2019002
|
K4
|
200
|
ST
|
FG126
|
1710
|
101
|
20
|
2019002
|
K4
|
100
|
ST
|
The result in the database will be reflected as follows:
0MATERIAL
|
0MATL_GROUP
|
0CUSTOMER
|
0SALESORG
|
0VERSION
|
0VTYPE
|
0FISCPER
|
0FISCPER3
|
0FISCYEAR
|
0FISCVARNT
|
0QUANTITY
|
0UNIT
|
TG10
|
L0001
|
17100001
|
1710
|
100
|
20
|
2019002
|
2
|
2019
|
K4
|
120
|
ST
|
TG10
|
L0001
|
17100002
|
1710
|
100
|
20
|
2019002
|
2
|
2019
|
K4
|
80
|
ST
|
FG126
|
L0002
|
17100001
|
1710
|
100
|
20
|
2019002
|
2
|
2019
|
K4
|
100
|
ST
|
TG10
|
#
|
#
|
1710
|
101
|
20
|
2019002
|
2
|
2019
|
K4
|
200
|
ST
|
FG126
|
#
|
#
|
1710
|
101
|
20
|
2019002
|
2
|
2019
|
K4
|
80
|
ST
|
Say I have the following records for actual volumes
Note that even though FISCPER3 and FISCYEAR is not in the
aggregation level, they are automatically derived. This holds true for all time-related characteristics and it is therefore recommended to keep as few time
characteristics in the aggregation level as possible.
Creating an aggregation level
The first aggregation level we will create is an aggregation
level in preparation of a copy function we will write in the next chapter. Our
first planning function will consist of a copy function, where actual volumes
is copied from the Actual Volume aDSO TVOL_V00, to the planning aDSO TVOL_A20.
The requirement from the customer states:
Initially, volumes
must be planned on material level, with a top-down distribution to customer
based on a reference historic period.
The aggregation level should contain all the characteristics
of the actual volume aDSO, excluding customer as a minimum. Time
characteristics 0FISCYEAR and 0FISCPER3 are also excluded, as those are
automatically derived from 0FISCPER.
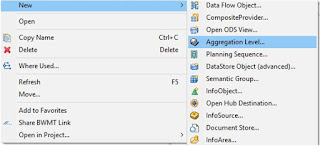
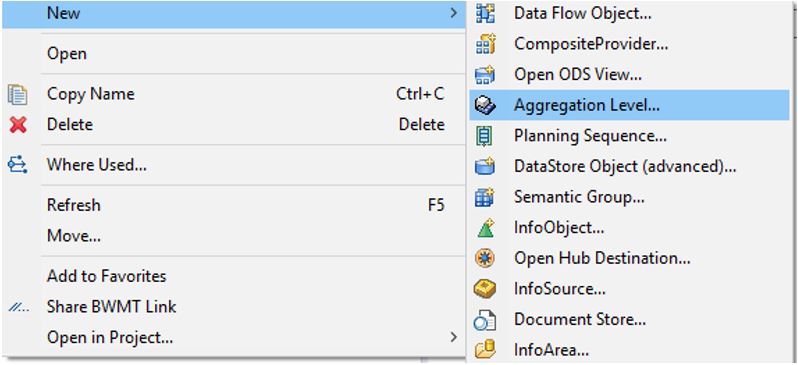
To create the aggregation level, select the InfoArea that
contains the composite provider and right click. Select New->Aggregation
Level


Set the name and description as below, and note that the
aggregation level is created on the Composite Provider:


To add characteristics and key figures, right-click in the Provider Fields block and add the
characteristics and key figures as follows:


The last step is to activate the Aggregation Level by clicking
 The aggregation level
will be displayed in the InfoArea under Aggregation levels:
The aggregation level
will be displayed in the InfoArea under Aggregation levels:


Filters
Where aggregation levels control what fields are written to, the filter tells us to which data intersection, or target area, to write to. A clear distinction must be made between what is reference data, and what is my target data area. It becomes really important when considering that the data in the target area is locked whenever the filter is active (either thought a query or planning function). We want to lock as small and area as possible to enable multiple users to work on the same aDSO or aggregation level without stopping their work. So let’s look at an example as an extension of the example used for aggregation levels.
In the example, we are copying information from one version
to another. Let’s assume that it takes place through the use of a planning
function and the purpose of the planning function only to copy data across version.
However, the user may want to limit the copying of the data to a sales
organisation for example.
Based on these statements, only a single field value
actually changes (fiscal year/period) and the sales organisation is only there
to refine the selection. In this case, the filter will at a minimum contain two
restrictions:
0VERSION
0SALESORG
The characteristic 0VERSION will have to be restricted to
the target, in this case 101, while the planning function must still select
data from 100. We can achieve this by creating two variables and use them in
the filter and planning functions as follows:


If we incorrectly try to write to a value outside out filter
value, we will be issued with an error and the data will not save.

It is good practice to add as many variables to the filter
as possible in order to ensure that as small a data area is locked.
So how does the filter interact with queries and planning
functions? In both instances, a selection of the target area is performed. The
query will only select data in the target area, while the planning function
will select data in the target area as well as potentially selecting data from
the reference data. There is no need to add both source and reference data to
the filter. If you do this, your function will still work, however, you will
incorrectly lock the reference data for planning as well.
After applying all the rules, the filter should look
something like the example below:


As the aggregation level is built on a Composite, it is good
practice to specify the target aDSO(s) on the filter as well.
Creating a filter
There are two methods to create a filter. One method is with
transaction RSPLAN, the other is using Eclipse. Let’s create the filter using
eclipse:


Right click on the aggregation level created in the previous
step and select New-Filter:
Enter the name and description of the filter:


Under the filter tab, add the filter characteristics by
right clicking and selecting Add
Characteristic. Restrictions can be added by right clicking on the
characteristic and selecting Restrict.


Click on save to save the
filter.
Conclusion
Aggregation levels and filters are two of the basic building blocks for planning functions and sequences. Aggregation levels defines a subset of the characteristics in the InfoProvider while the filter determines the target data area. In the next chapter, we will build a planning sequence to copy data and illustrate these principles in more detail.
If you like this chapter, please support me on Patreon:
No comments:
Post a Comment